Applying Spread
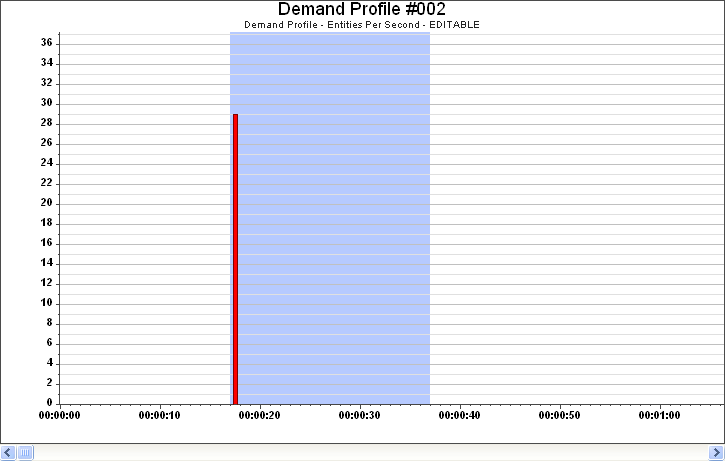
The Spread function takes the demand in a single demand entry and spreads it uniformly across a specified time period, starting from the time of the selected demand.
The following procedure assumes that you have already selected an Arrival or Event Profile.
To apply a Spread:
-
Select the single demand entry that you want to Spread.
If you want to define the duration of the spread at the same time as selecting the data entry, click on the entry and drag the cursor to the right until you have also selected the time-range.
-
Right-click in the graph and select
.
If you have already highlighted the duration of the spread, then the spread is instantly applied and you do not need to complete step 3. If you did not select the duration, the ‘Apply Spread’ dialog box is displayed.
- Enter the Spread duration, in seconds.
-
Click the
OK button to apply the spread.
If the result of a spread overlaps either existing demand in the profile or demand from subsequent spread selections, the ‘Spread Duration Overlaps Existing Data’ message is displayed.
In this situation, you have three choices: